The Backstory
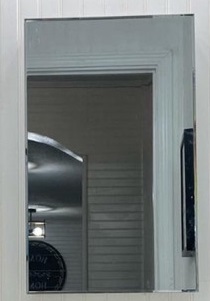
Every morning, I faced that sad little bathroom mirror. You know the one — plain, cheap, builder-grade, and about as inspiring as a DMV waiting room. Finally, I looked at it and thought, “Nope. Queen energy doesn’t start her day staring into this.” So instead of buying a whole new mirror, I decided to frame the beast and make it look custom. Spoiler: it worked.
What You’ll Need 🛠️
- Miter saw (or miter box + hand saw if you’re old school)
- Wood molding (I picked a style that said “classy but not trying too hard”)
- Gorilla Mounting Tape [Amazon link here]
- Spray paint (I went gold, but you do you, boo)
- Measuring tape & marker
- Clamps (optional, but they make life easier)
- Patience and maybe a little playlist (Lizzo highly recommended 🎶)
Step 1: Measure Like a Boss
My medicine cabinet mirror was 16” x 26”. Since I wanted the frame to sit right on top of the glass, I measured those exact dimensions and marked my molding pieces.
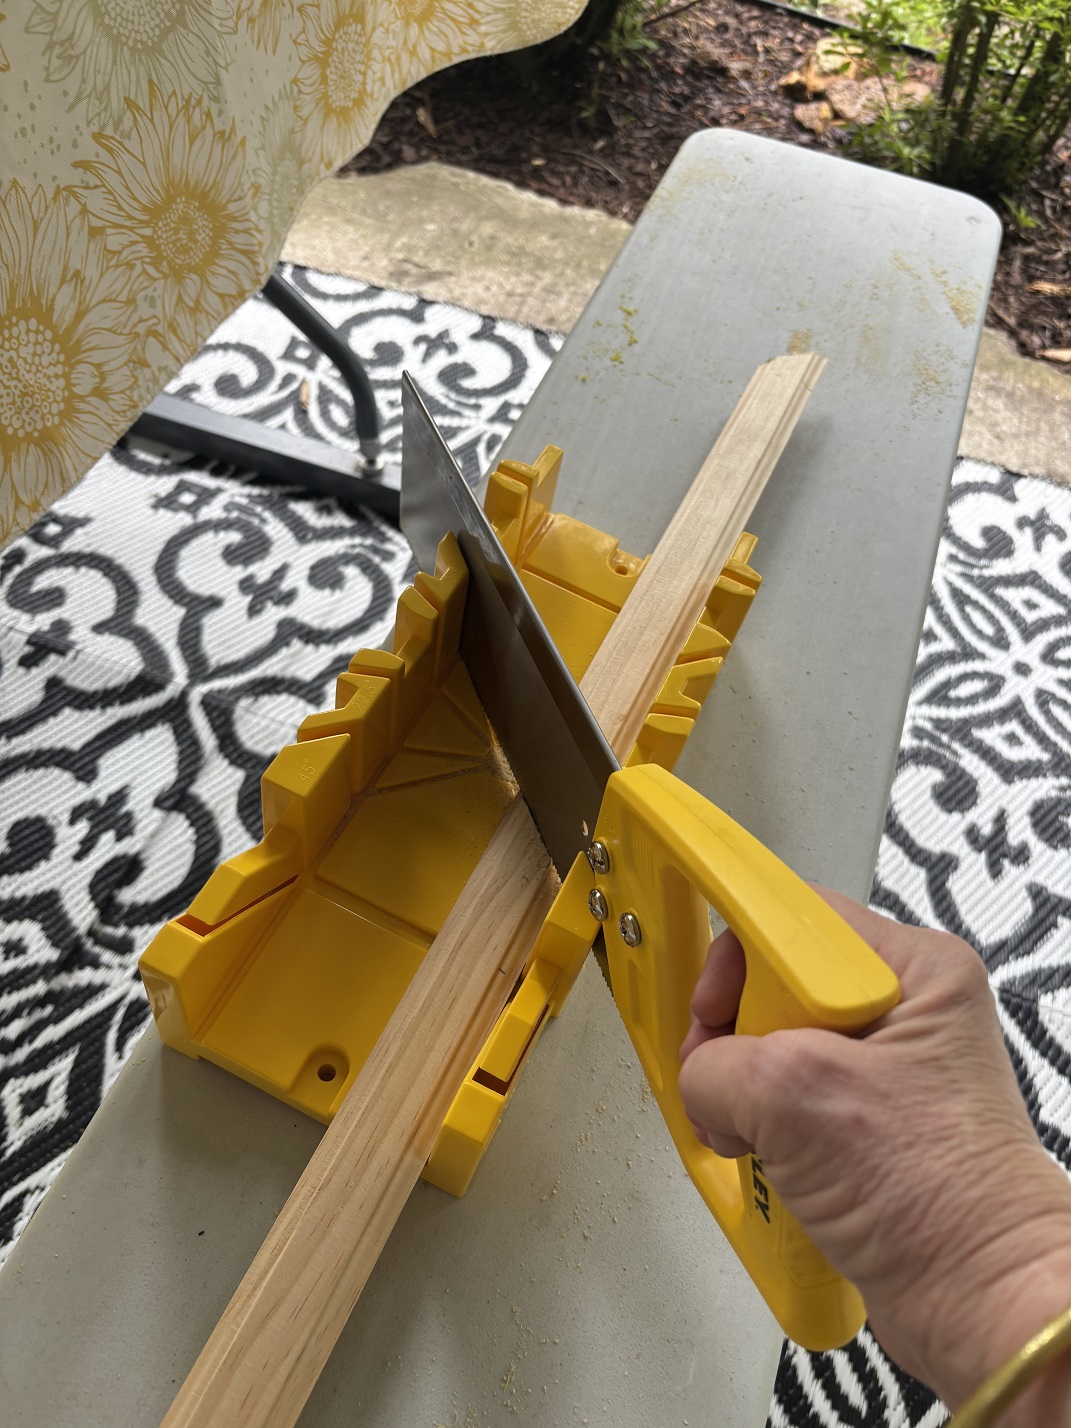
Step 2: Make Those Cuts ✂️
Set your miter saw (or miter box) to 45°. Here’s the trick: place your blade right on the line you marked, not beside it, so you don’t lose precious millimeters. I cut two 16” lengths and two 26” lengths.
Step 3: Test Fit (and Pretend You’re on HGTV)
Lay your pieces out around the mirror to make sure everything lines up. If it doesn’t — don’t panic. Sandpaper and a little “I meant to do that” attitude can fix a lot.
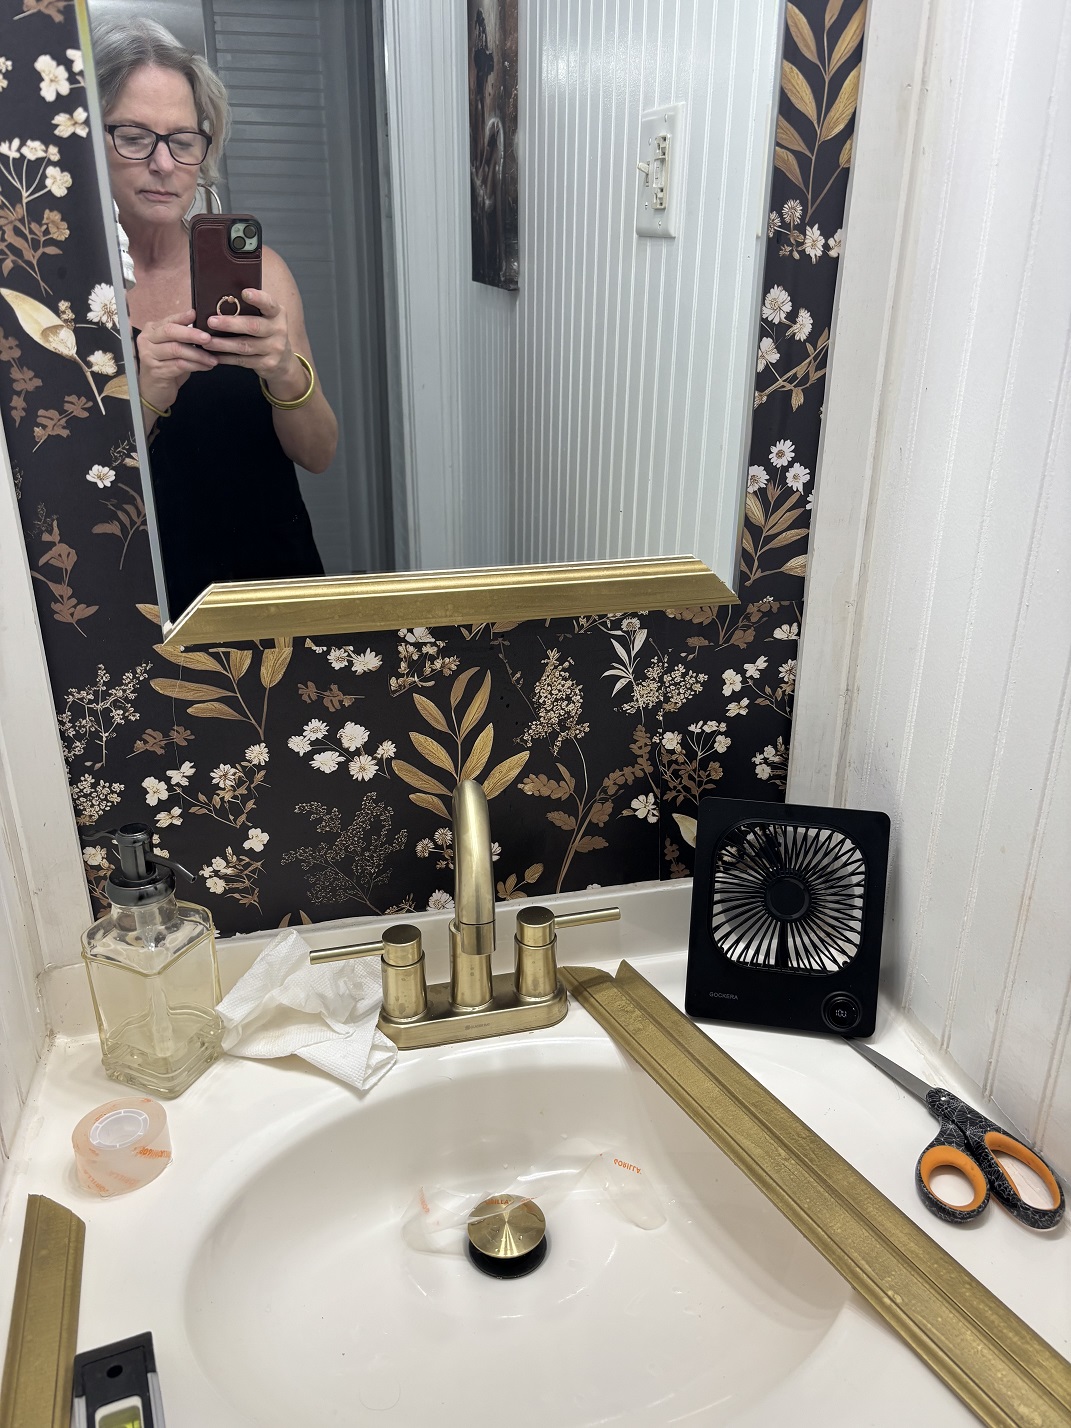
Step 4: Glam It Up ✨
Time for spray paint! I went with gold because, let’s be real, if I’m brushing my teeth in front of this thing twice a day, it needs some sparkle. Pro tip: spray in thin layers so it doesn’t run.
Step 5: Stick It Like Velcro on Steroids
Once dry, I used Gorilla Mounting Tape to secure the frame directly to the mirror. That stuff holds like a toddler with separation anxiety — once it’s on, it’s ON.
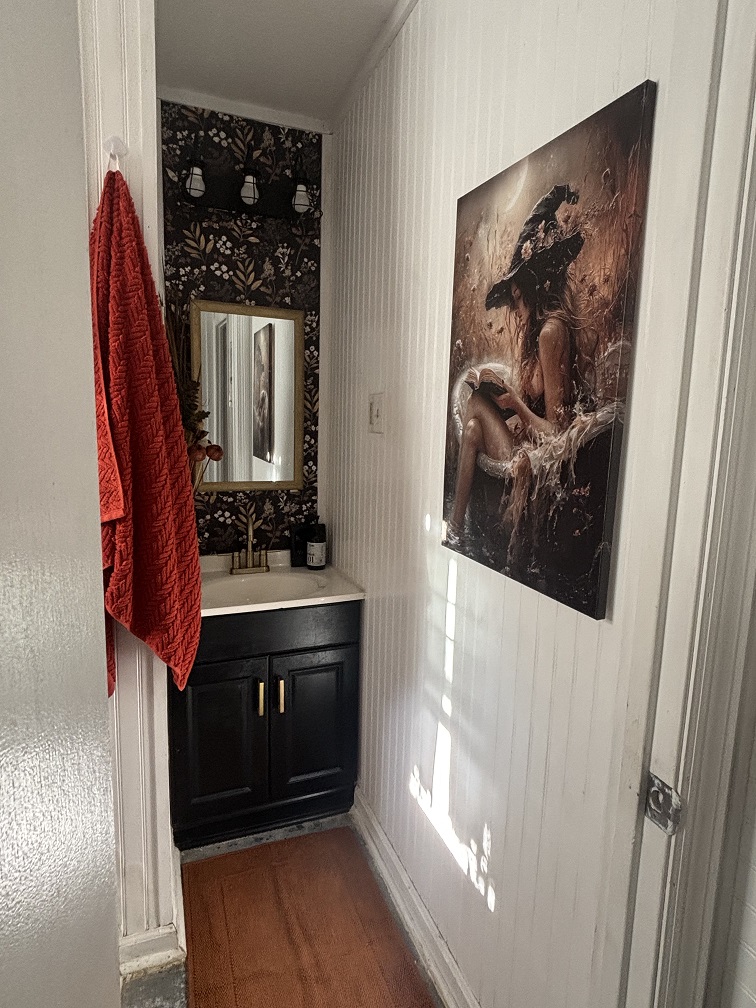
Step 6: Bask in Your Glory 👑
And just like that, my sad little medicine chest turned into a Pinterest-worthy statement piece. The total cost? About $30. The satisfaction of standing back, admiring my handiwork, and saying, “Damn, I did that”? Priceless.
Final Thoughts
Ladies (and gents, too), if your mirror is giving you attitude every morning, don’t replace it — frame it. With a few tools, some sass, and a sprinkle of DIY magic, you can turn “ugh” into “ooh la la” in a weekend.


Leave a comment